1. 前期准备
2. 代理服务器
打开代理软件,连接上代理服务器
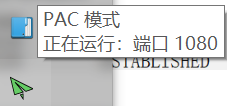
确定代理软件的占用端口,一般默认
1080端口今天突然发现蛇皮了,将鼠标移动到小图标会显示出端口号
如果你用的其他代理软件,不知道端口号是多少,可用下面方法查看
1.打开设备管理器,找到代理软件的详细信息确认PID
2.CMD打开命令行,查看端口占用信息,使用netstat -ano命令即可查看全部端口占用信息3.
Ctrl+F查找之前找到的PID,确认占用端口


3. 设置git代理
- 打开
Git Bash - 设置代理
1 | #全局设置 |
- 取消设置代理
1 | # 取消全局代理 |
4.测试结果
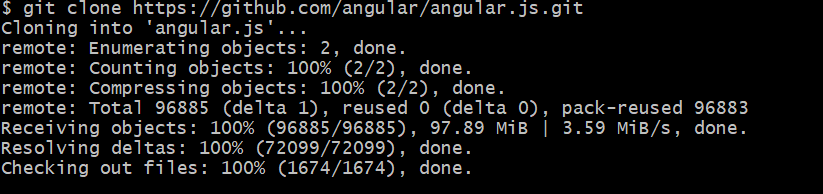
成功!!
本博客所有文章除特别声明外,均采用 CC BY-NC-SA 4.0 许可协议。转载请注明来自 BIA!


评论